


This is the first post in a series of two looking at debugging and tracing MySQL, which has been a foundation stone of the tech industry, utilized by applications big and small, from personal blogs to complex e-commerce platforms. MySQL has demonstrated adaptability and robustness countless times, making it a critical part of the Internet’s infrastructure. This adaptability has helped MySQL remain relevant amidst the constantly evolving technological landscapes. It has become a vital foundation for countless solutions due to its ability to scale and manage complex data structures quickly and easily. This has led digital platform builders and maintainers to consider MySQL an essential asset in their toolkit.
While the core of Mysql has evolved to become the robust database deployment it is now, Debugging Mysql can still be challenging, especially when dealing with various programming environments like Python and Node.js. Identifying and resolving application issues can take a lot of time and effort, with extensive log analysis and moments of frustration being common. This task becomes even more complex when multiple languages interact with the database, each with unique nuances.
This blog will explore those challenges and how to overcome them, with the first part looking at how to set up the demo environment alongside some OpenTelemetry via the Lumigo Distros.
So let’s get started by build some apps to debug.
Setting Up the Demo Environments
If you haven’t already, the first step is to install Docker on your system or within your development envirnment, as they will be fundimental in containerizing the Python Flask and Node.js applications alongside a MySQL database. You will also need a lumigo account, which is quick and easy to set up. From this, we will need to retrieve a lumigo token from your settings to connect some opentelemetry later.
Begin by creating a project directory and navigate into it:
mkdir flask_node_mysql_demo && cd flask_node_mysql_demo
Within this directory, create two subdirectories for the Flask and Node.js applications:
mkdir flask_app node_app
Create a docker-compose.yml file at the root of your project directory:
version: ‘3’
services:
  flask_app:
    container_name: flask_app_container
    build: ./flask_app
    ports:
      – “3050:3050”
    depends_on:
      – db
    environment:
      – LUMIGO_TRACER_TOKEN=${LUMIGO_TRACER_TOKEN}

  node_app:
    container_name: node_app_container
    build: ./node_app
    ports:
      – “3000:3000”
    depends_on:
      – db
    environment:
      – LUMIGO_TRACER_TOKEN=${LUMIGO_TRACER_TOKEN}

  db:
    container_name: mysql_db_container
    image: mysql:8.3
    environment:
      MYSQL_ROOT_PASSWORD: password
      MYSQL_DATABASE: demo
    ports:
      – “3306:3306”
Navigate to the flask_app directory and create a Dockerfile:
FROM python:3.12-slim
WORKDIR /app
COPY . /app
RUN pip install Flask mysql-connector-python lumigo_opentelemetry
EXPOSE 3050
ENV OTEL_SERVICE_NAME=”python-app”
ENV AUTOWRAPT_BOOTSTRAP=lumigo_opentelemetry
CMD [“python”, “app.py”]
Of course one big red security flag here is the setting of database password inside the docker compose. It is a practice only reserved for quick demos or prototypes and should never be allowed into operational systems.
Next, we need to create a app.py file within the same directory and populate it with the following:
from flask import Flask, request, jsonify
import pymysql.cursors

app = Flask(__name__)

def create_connection():
    return pymysql.connect(
        host=’db’,
        user=’root’,
        password=’password’,
        database=’demo’,
        cursorclass=pymysql.cursors.DictCursor
    )

@app.route(‘/’)
def hello_world():
    return ‘Hello World’

@app.route(‘/records’, methods=[‘GET’, ‘POST’])
def handle_records():
    connection = create_connection()
    try:
        with connection.cursor() as cursor:
            if request.method == ‘POST’:
                sql = “INSERT INTO records (name) VALUES (%s)”
                cursor.execute(sql, (request.json[‘name’],))
                connection.commit()
                return jsonify(message=”Record added successfully”)
            else:
                sql = “SELECT * FROM records”
                cursor.execute(sql)
                records = cursor.fetchall()
                return jsonify(records)
    except Exception as e:
        return jsonify(message=str(e)), 500
    finally:
        connection.close()

if __name__ == ‘__main__’:
    app.run(host=’0.0.0.0′, port=3050)
Now step back a directory and navigate into the depths of the node_app directory, then create a Dockerfile:
FROM node:20
WORKDIR /app
COPY package*.json ./
RUN npm install
COPY . .
EXPOSE 3000
ENV OTEL_SERVICE_NAME=”express-app”
ENV NODE_OPTIONS=”-r @lumigo/opentelemetry”
CMD [“node”, “app.js”]
Within the node_app directory, create a package.json and copy the following:
{
  “name”: “node_app”,
  “version”: “1.0.0”,
  “description”: “”,
  “main”: “app.js”,
  “scripts”: {
    “start”: “node app.js”
  },
  “dependencies”: {
    “@lumigo/opentelemetry”: “^1.37.0”,
    “express”: “^4.18.3”,
    “mysq2l”: “^3.9.2”
  }
}
You’ll notice here that we also call in the Lumigo JS Distro, which will not need to be referenced in the code because we will use the no-code implementation via the container env vars so that we do not need to change any code within the codebase (this is my favorite part).
Now create a app.js file and copy over this code:
const express = require(‘express’);
const mysql = require(‘mysql2’);
const app = express();
app.use(express.json());

function connectWithRetry(attemptsLeft = 5) {
  const connection = mysql.createConnection({
    host: ‘db’,
    user: ‘root’,
    password: ‘password’,
    database: ‘demo’
  });

  connection.connect(error => {
    if (error) {
      console.error(‘Failed to connect to db, retrying…’, error);
      if (attemptsLeft > 0) {
        setTimeout(() => connectWithRetry(attemptsLeft – 1), 5000); // Wait 5 seconds before retrying
      } else {
        throw error;
      }
    } else {
      console.log(‘Successfully connected to the database.’);
      global.dbConnection = connection; // Make the connection globally available
    }
  });
}

connectWithRetry();

app.get(‘/’, (req, res) => {
  res.send(‘Hello World’);
});

// Use the global.dbConnection in your routes
app.get(‘/records’, (req, res) => {
  global.dbConnection.query(‘SELECT * FROM records’, (error, results) => {
    if (error) throw error;
    res.json(results);
  });
});

app.post(‘/records’, (req, res) => {
  const { name } = req.body;
  global.dbConnection.query(‘INSERT INTO records SET ?’, { name }, (error, results) => {
    if (error) throw error;
    res.json({ message: ‘Record added successfully’ });
  });
});

app.listen(3000, () => {
  console.log(‘Node.js app is listening on port 3000’);
});
With the Dockerfiles and application code in place, navigate back to the root directory in the flask_node_mysql_demo directory, and launch the applications using this, making sure also to include your Lumigo Token in replace of the your_token_here:
LUMIGO_TRACER_TOKEN=your_token_here docker-compose up -d
This will build and start the Flask and Node.js app containers, making them both accessible on their respective ports (5000 for Flask, 3000 for Node.js) and connected to the same MySQL instance. Give it a few minutes to get everything up and running, a sidenote here is that the Node app might throw a few ECONNREFUSED errors until the database is up and running before it is available to connect to.
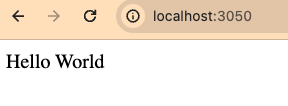
Once everything is settled down and is all running, then you can open each of the demo app URLs in a browser, http://localhost:3050/ for the Python app and http://localhost:3000/ for the Node App. A time saver here is that if you select both browser tabs, you can refresh both at the same time, and if everything is working well, both should show a “hello world” message.
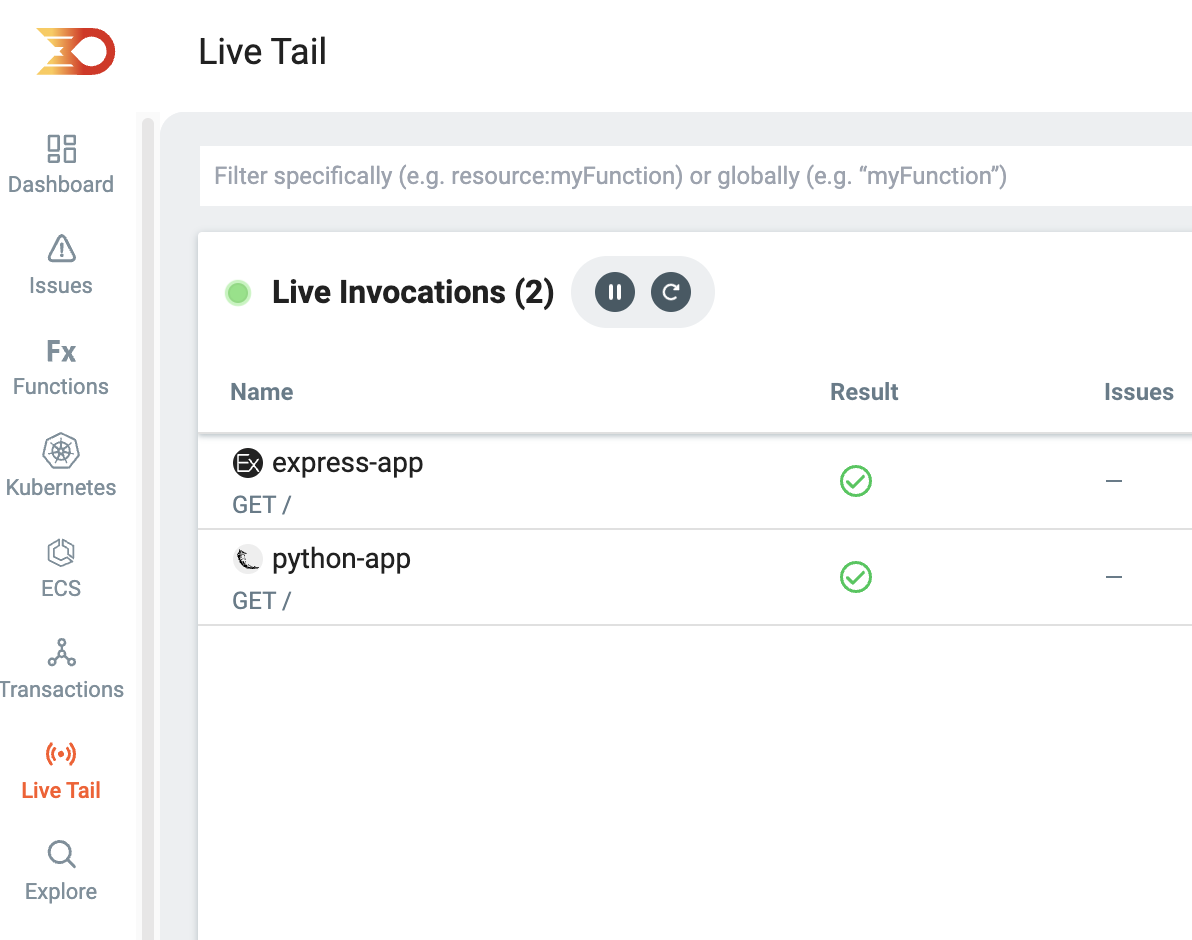
One of my favourite things about Lumigo instrumentation is that it doesn’t require any code changes, which makes it really easy to deploy OpenTelemetry without disrupting the codebase. You can then easily check the status of the app routes on your Lumigo instance by visiting the Live invocations tab, which is also a great place to verify that the Lumigo opentelemetry distros have been successfully deployed.
Check out part 2
With our demo environments now established and combining Lumigo and OpenTelemetry, we’ve laid a strong groundwork for fast and efficient monitoring—head on over for part 2 of this post, where we will look deeper into the intricacies of debugging. We’ll explore the common pitfalls and challenges encountered when our applications interact with MySQL, offering insights and ways to boost and enhance your debugging and tracing.