


As a developer I love automation, Whether it’s orchestrating a smart home or optimizing developer toolchains. Automation injects efficiency into my daily routine, simplifying intricate processes and eliminating repetitive tasks. Especially when it comes to toolchains, I’m constantly on the lookout for ways to boost coding workflows. Cloud Development Kits (CDKs) brought with them a new era of streamlined developer toolchains. They’ve become the backbone of robust application infrastructure, enabling us to swiftly integrate and deploy various tools, and they bring our cloud-based apps to life faster than ever before
Among these, the AWS Cloud Development Kit (CDK) certainly takes center stage. It’s not just a tool, but completely changes how we perceive and interact with cloud resources. Instead of grappling with intricate templates and configurations, developers like me can now define infrastructure using programming languages we already know and love. This has empowered many to adopt the AWS CDK, as it marries the familiarity of coding with the scalability of AWS services. Essentially, it’s like having a supercharged toolset that swiftly translates our code-centric visions into cloud realities.
In this article, we’ll dive deeper into how the AWS CDK can turbocharge your development process. Additionally, we’ll also look at how the Lumigo CDK constructs can add to this, enabling even speedier tracing for AWS deployments.
Understanding Cloud Development Kits (CDK)
A Cloud Development Kit, known as a CDK, is a software development framework that gives you high-level components to define cloud infrastructure in code and provision it using cloud providers’ native tooling. Instead of configuring cloud resources using GUI-based dashboards or writing extensive scripts, CDKs enable you to harness the power of modern programming languages to declare, compose, and share cloud infrastructure just like any other software component.
The primary benefit of a CDK is that it offers a more intuitive, developer-friendly abstraction over traditional infrastructure configuration techniques. It bridges the gap between infrastructure and application code, promoting best practices, reducing boilerplate, and allowing for component reuse and bootstrapping.
A CDK example using the AWS CDK
The AWS CDK isn’t just a tool for a handful of resources; it’s designed to span across the vast ecosystem of Amazon’s cloud offerings. With just a few lines of CDK code, you can tap into and deploy a comprehensive range of services, effectively translating intricate cloud setups into simplified, code-driven structures.
The expansive nature of this approach not only underscores the versatility of the AWS CDK but also highlights its potential in modern cloud development scenarios. It allows you to quickly define cloud resources using familiar programming languages such as JavaScript, TypeScript, Python, Java, Go, and more.
Starting out using the AWS CDK is a breeze and once installed offers a multiple of ways to quickly start building apps. Simply run npm install -g aws-cdk in your development workspace, and once that’s done we are good to start rapidly creating apps using AWS services.
Taking the AWS CDK for a Lambda Spin
Create a directory in your local environment and navigate into it using your CLI of choice. Initiate a new typescript CDK app in the directory root by running `cdk init app –language typescript`. This process will take a few moments to configure and create all the components needed for your new demo app.
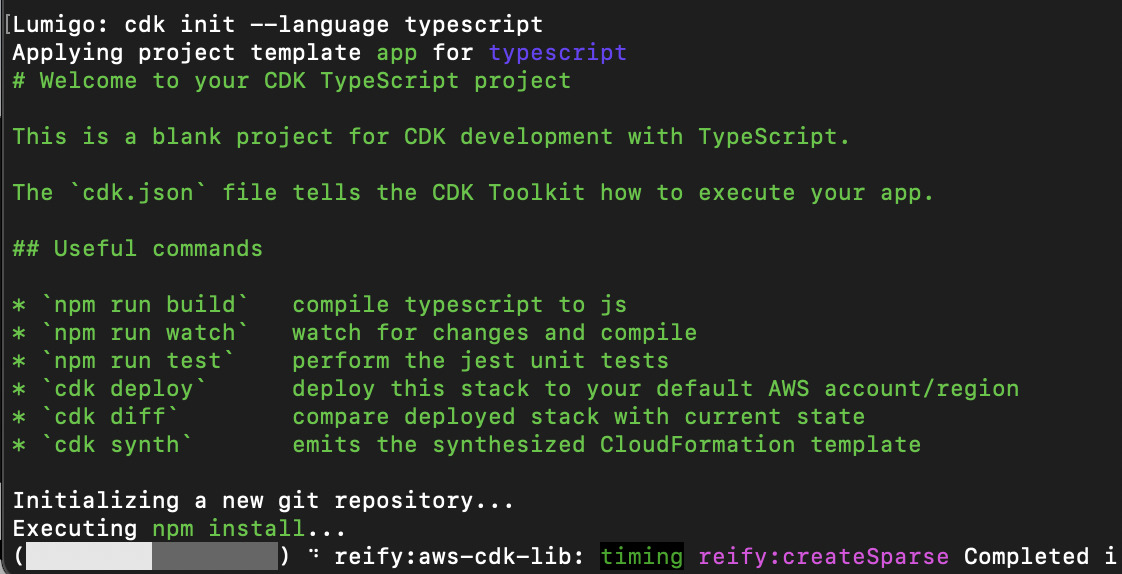
The CDK will create a basic typescript app using a CDK template, ready for additional components to be added. Once finished it should look something like this:
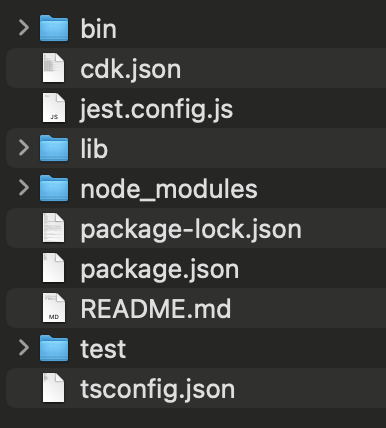
The main files here that we are going to be interacting with are located in the `bin` and `lib` folders, these will vary slightly depending on what your original base folder is called:
bin/{folder_name}_service.ts – The main entry point for the application.

lib/{folder_name}-stack.ts – Defines the service stack.
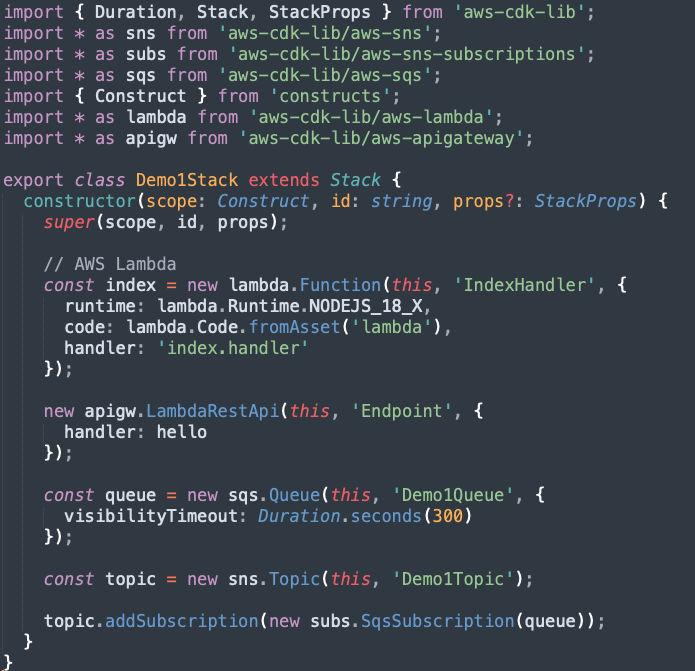
The generated sample app will also include SNS and SQS components Open the _stack.ts file and you’ll see something like this, which will vary slightly depending on what your project folder is called.
import { Duration, Stack, StackProps } from 'aws-cdk-lib';

import * as sns from 'aws-cdk-lib/aws-sns';

import * as subs from 'aws-cdk-lib/aws-sns-subscriptions';

import * as sqs from 'aws-cdk-lib/aws-sqs';

import { Construct } from 'constructs';


export class Demo1Stack extends Stack {

  constructor(scope: Construct, id: string, props?: StackProps) {

    super(scope, id, props);


    const queue = new sqs.Queue(this, 'Demo1Queue', {

      visibilityTimeout: Duration.seconds(300)

    });


    const topic = new sns.Topic(this, 'Demo1Topic');


    topic.addSubscription(new subs.SqsSubscription(queue));

  }

}
Keep that file open, we will come back to that. In the meantime, let’s add some Lambda to this, in the root directory create a folder called lambda, and create a file called index.js and add the following code to the file:
 exports.handler = async function(event) {

  console.log("request:", JSON.stringify(event, undefined, 2));

  return {

    statusCode: 200,

    headers: { "Content-Type": "text/plain" },

    body: `Hello CDK World!`

  };

};
Open up, or switch to, the *-stacks.ts file in the lib folder, which will vary slightly depending on what your project folder is called, and add the following import at the bottom of the typescript imports at the top of the file.
import * as lambda from 'aws-cdk-lib/aws-lambda';

import * as apigw from 'aws-cdk-lib/aws-apigateway';
Then under the super()` function (which should be about line 11), add the following:
    // AWS Lambda

    const index = new lambda.Function(this, 'IndexHandler', {

      runtime: lambda.Runtime.NODEJS_18_X,

      code: lambda.Code.fromAsset('lambda'),

      handler: 'index.handler'

    });


   new apigw.LambdaRestApi(this, 'Endpoint', {

      handler: index

    });
In this snippet, the handler: is defined by the index.ts file with the handler function, naming the file and handler differently will need to be reflected in this section here. Also in this snippet we are adding in some instructions for the CDK to additionally connect API gateway to this lambda when it deploys.
Run a cdk synth in the project root from the CLI, to make sure everything is saved and looking ok. This will do a quick check to make sure it’s got everything it needs to do an actual deployment. If that all passes, then run a cdk bootstrap which should look like this:

Then once finished, and it all checks out ✅, run a cdk deploy, and follow the prompts if everything looks ok in the deployment.
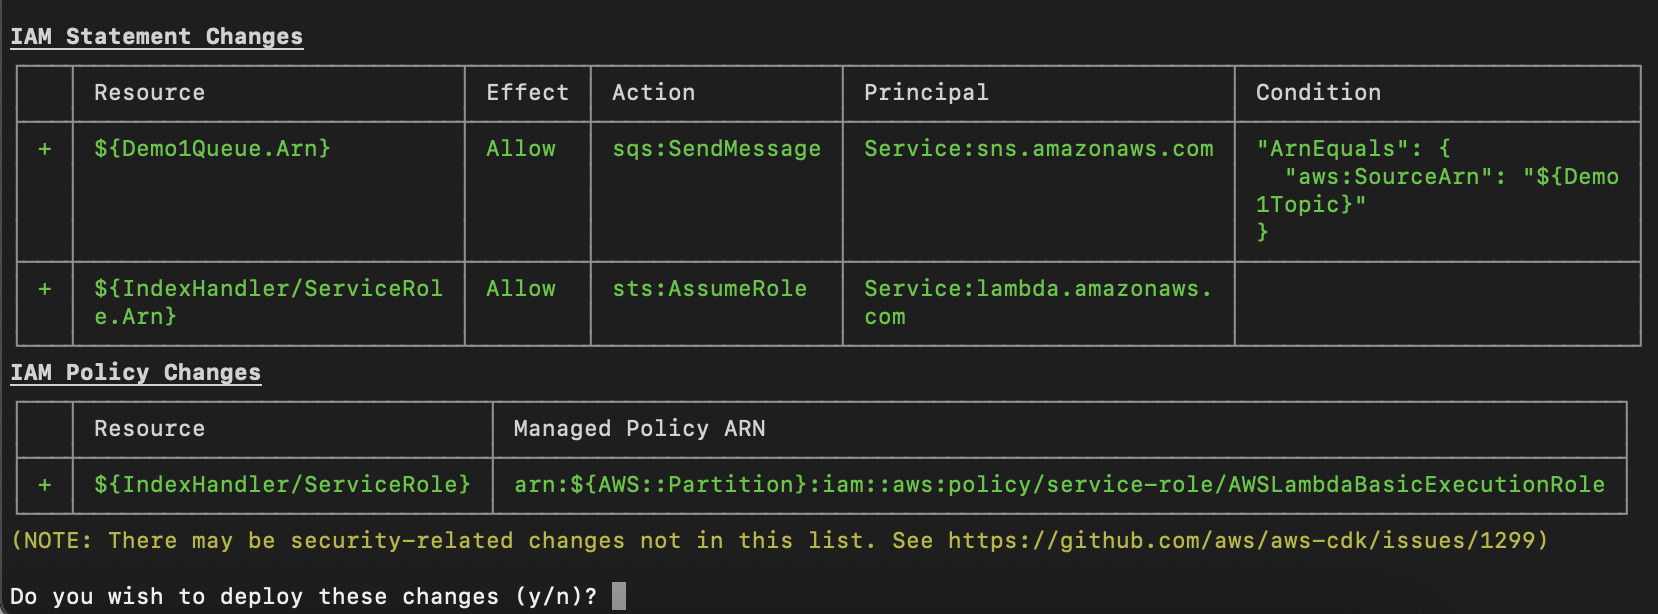
This should run for a moment or two, then return something like this:
Stack.Endpoint8024A = https://apfagmskze.execute-api.us-east-1.amazonaws.com/prod/
Using that url you can then use that as part of a curl call to test it out via the following command in the cli:
Curl https://apfagmskze.execute-api.us-east-1.amazonaws.com/prod/
Mixing in the Lumigo CDK
The best part here is if you thought that first part was easy this will be even easier, Also this is a 1-click deployment that is also going to monitor all the node and python workloads running on Lambda and ECS that are managed using the AWS CDK. For this next part of the demo you are going to need to sign up for a free lumigo account, and to then retrieve your lumigo token. from your Lumigo instance (Spoilers: its in the settings and then tracing)
Start by adding the lumigo CDK by running the following in the project root:
npm install @lumigo/cdk-constructs-v2
Then we just need to apply autotracing to all the supported lambda constructs in the stack by adding and amending to the very top of the imports `*stack.ts` file
import { Lumigo } from '@lumigo/cdk-constructs-v2';

import { App, SecretValue } from 'aws-cdk-lib'; #or add to an existing `aws-cdk-lib` entry
Then at the bottom of the stack file, under the stacks and constructs, add the following two lines
new Lumigo({lumigoToken:SecretValue.secretsManager('LumigoToken')}).traceEverything(app);

app.synth();
Save the file and then run cdk synth again and while that’s running head to AWS Secrets Manager to safely store your Lumigo Token. When both tasks are done, run cdk deploy.
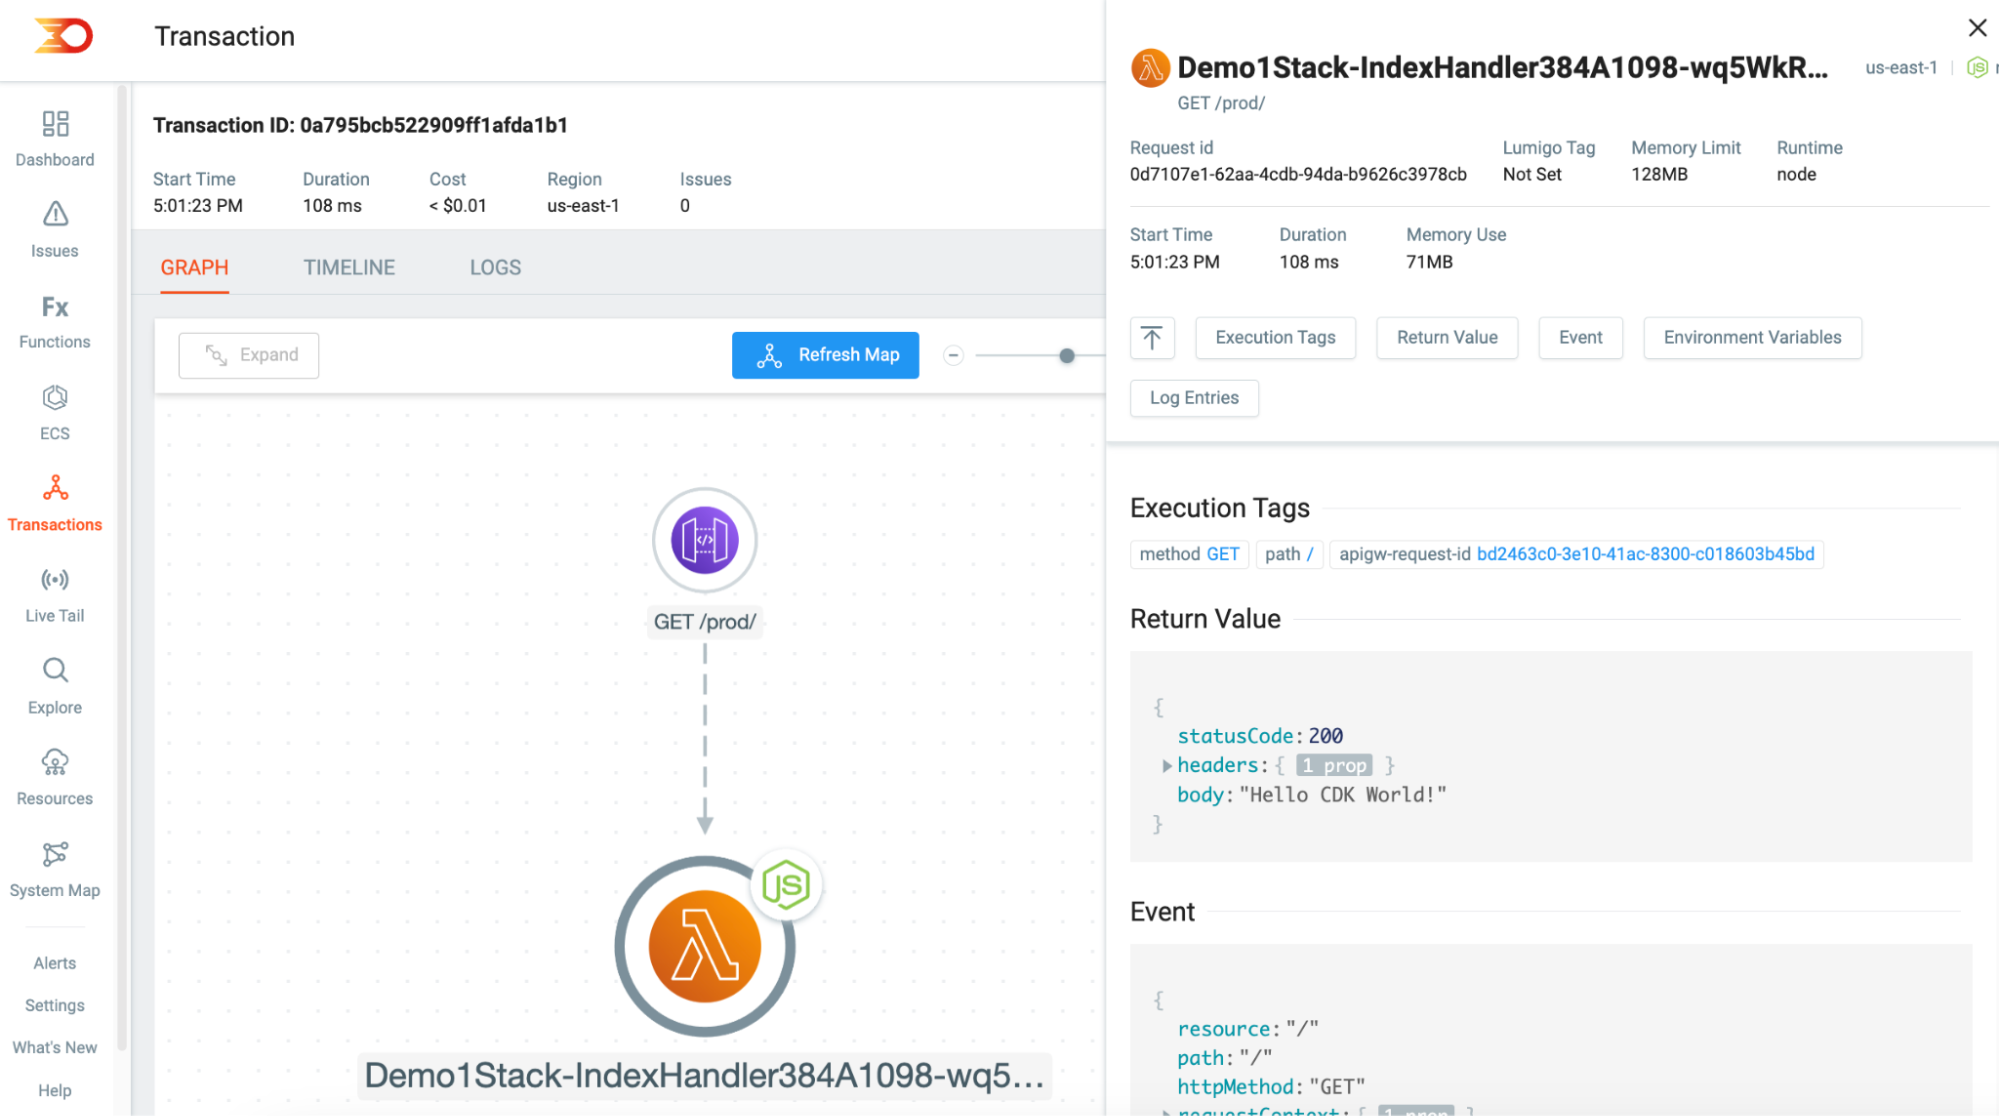
Run a few curl calls again to the url returned and you will now also see some trace data coming through in your Lumigo instance. Also you can now start to add in additional services like SNS and SQS, from the CDK template, which will automatically have instrumentation added and traced as part of the build process.
What excites me the most about this is that the CDK becomes more automation powerful the more you use it, configuring and saving more components into the CDK environmental settings. This ultimately accelerates dev immensely and enhances observability in newly developed apps at the same time!
To read more on our CDK and its capabilities, check out the Lumigo AWS CDK docs or see the Lumigo CDK Constructs NPM
Install the CDK and give it a try
Remember to clean up when you are done by running cdk destroy from the CLI in the root directory. As applications grow in complexity, especially in the cloud-native world, tools like CDK become indispensable. By offering an easy and fast way to add additional components to apps. Ultimately its about automating what you can so that you can focus on what you do best—building great applications—while keeping a vigilant eye on performance and potential issues through auto-instrumentation.
If you found this article informative, please consider sharing it with others who might benefit from the insights shared here. We’re eager to hear about how you’re utilizing the power of CDKs in creative and innovative ways to power-up your dev workflows.
Happy coding!