- Guide Content
OpenTelemetry for Java Applications: A Practical Guide
OpenTelemetry is an open-source project within the Cloud Native Computing Foundation (CNCF) that provides APIs, libraries, agents, and instrumentation for telemetry data. It provides strong support for Java. Telemetry data refers to metrics, logs, and traces, which are used to understand the behavior and performance of a system. OpenTelemetry is a unified and vendor-neutral solution for collecting and managing this data.
The project provides a comprehensive set of APIs for collecting different forms of telemetry data and supporting a wide range of observability platforms, including an API and SDK for Java monitoring. The goal of OpenTelemetry is to make telemetry a built-in feature of cloud-native software.
OpenTelemetry simplifies the instrumentation of applications, including Java applications. It provides a standardized way to collect, process, and export various forms of telemetry data. With OpenTelemetry, you can track the journey of requests as they travel through your system, measure the latency of services, and monitor the health of your Java environment.
Learn more in our detailed guide to OpenTelemetry architecture
In this article
Important Java Metrics to Monitor
Here are some of the most important Java metrics you can instrument and monitor with OpenTelemetry.
JVM Metrics
The Java Virtual Machine (JVM) is the runtime environment where Java applications are executed. Monitoring JVM metrics gives you insights into the performance and health of your applications.
- Heap memory usage is one of the most important JVM metrics. It tells you how much of the JVM’s heap memory is being used. If your application is using too much heap memory, it could lead to OutOfMemoryError.
- Garbage collection (GC) metrics are also crucial. GC is the process of automatically reclaiming the unused runtime memory. Monitoring GC can help you understand the memory usage of your applications and optimize their performance.
- Thread count is another significant JVM metric that shows the number of active threads in the JVM. A sudden increase in the thread count could indicate a potential issue in your application.
CPU Metrics
CPU metrics provide information about the usage of the CPU resources by your Java applications. High CPU usage could degrade the performance of individual applications or the whole system.
- CPU utilization shows the percentage of time the CPU is busy executing tasks. If CPU utilization is consistently high, it could indicate that your application is consuming too many CPU resources.
- The system load average represents the average workload of the CPU during a specific period. A high system load average could indicate that your application is overloading the CPU.
Application Metrics
Application metrics are specific to a particular Java application. They provide insights into the behavior and performance of the application.
- Response time is a crucial application metric. It measures the time it takes for your application to respond to a request. A high response time could lead to a poor user experience.
- Throughput is another important application metric that represents the number of requests processed by your application per unit of time. Monitoring throughput can help you understand the capacity of your application and plan for scaling.
I/O Metrics
I/O metrics provide information about the input/output operations of your Java applications. They give insights into how your applications interact with the system resources.
- Disk I/O metrics show the amount of data read from or written to the disk by your applications. High disk I/O could indicate that your applications are heavily dependent on disk operations.
- Network I/O metrics represent the amount of data sent and received over the network by your applications. Monitoring network I/O can help you understand the network usage of your applications and optimize their performance.
Concurrency Metrics
Concurrency metrics provide insights into the concurrent execution of tasks in your Java applications. They are crucial for understanding and optimizing the performance of multi-threaded applications.
- Thread pool usage shows the number of threads in use in the thread pool. Monitoring thread pool usage can help you optimize the thread pool size and improve the performance of your applications.
- Lock contention measures the time threads spend waiting to acquire a lock. High lock contention could degrade the performance of your applications.
How OpenTelemetry Works with Java Applications
OpenTelemetry Java API
The OpenTelemetry Java API is a critical part of the OpenTelemetry ecosystem. It provides an interface for programmers to emit telemetry data from their applications, offering standard and unified semantics, definitions, and assumptions about data formats and protocols. The Java API is a set of interfaces and classes that you can use to record telemetry data in your application.
Working with the OpenTelemetry Java API is relatively straightforward. It provides a simple way to collect traces, metrics, and logs from your applications. The API is designed to be low-overhead and is optimized to reduce the impact on application performance. This makes it suitable for observability in performance-critical applications.
OpenTelemetry Java SDK
The OpenTelemetry Java SDK is the implementation of the OpenTelemetry Java API. It provides the necessary components to collect, process, and export telemetry data. The SDK is designed to be flexible and configurable. It provides a robust set of features that gives developers control over how telemetry data is collected and exported.
The SDK includes several components, such as the TracerProvider, MeterProvider, and BaggageManager, which let you create and manage traces, metrics, and baggage, respectively. The SDK also includes a Processor and an Exporter, which process and export telemetry data to a backend of your choice.
Auto-Instrumentation Agent
The OpenTelemetry Auto-Instrumentation Agent is a powerful tool that automatically instruments your Java applications to capture telemetry data. The agent uses byte code manipulation to add telemetry collection code to your application without requiring any changes to your source code.
The auto-instrumentation agent is useful in scenarios where you don’t have access to the application’s source code or where manual instrumentation would be too time-consuming or complex. However, while the agent can capture a broad range of data, it may not cover all aspects of your application. In some cases, manual instrumentation may still be necessary to capture specific or custom telemetry data.
Learn more in our detailed guide to OpenTelemetry collector
OpenTelemetry in Java Example
Now that we have a fundamental understanding of OpenTelemetry in Java let’s walk through a practical example of how to use it.
You can download the OpenTelemetry Java distro here.
Installation and Dependencies
The first step is to set up the environment and install the required dependencies. OpenTelemetry provides a variety of libraries to instrument different types of applications, and for our Java application, we’ll use the OpenTelemetry Java SDK.
Firstly, ensure that Java is installed on your machine by running the command java -version in your terminal. If Java is not installed, you’ll need to install the appropriate version for your operating system. Once Java is installed, you can proceed to setting up OpenTelemetry.
To install OpenTelemetry, add the OpenTelemetry Java SDK as a dependency in your project. If you’re using Maven, add the following lines to your pom.xml file:
<dependency>

  <groupId>io.opentelemetry</groupId>

  <artifactId>opentelemetry-sdk</artifactId>

  <version>1.29.0</version>

</dependency>
Replace latest.version with the latest version of OpenTelemetry Java SDK. Now, you have successfully installed OpenTelemetry in your Java application and you’re ready to create and launch your HTTP server.
Create and Launch an HTTP Server
After installation, the next step is to create and launch a simple HTTP server. For this example, let’s use the popular Java framework, Spring Boot, to set up a basic server.
Creating a Spring Boot application is straightforward. You can use Spring Initializr, a handy tool that generates a Spring Boot project with the specific dependencies you need. For our example, we’ll need the ‘Spring Web’ dependency to create an HTTP server.
Once you have generated and downloaded your Spring Boot project, navigate to the src/main/java/com.example.demo directory and create a new DemoController class. This class will handle HTTP requests. Here’s an example of what the DemoController class might look like:
import org.springframework.web.bind.annotation.GetMapping;

import org.springframework.web.bind.annotation.RestController;

@RestController

public class DemoController {

    @GetMapping("/hello")

    public String hello() {

        return "Hello, World!";

    }

}
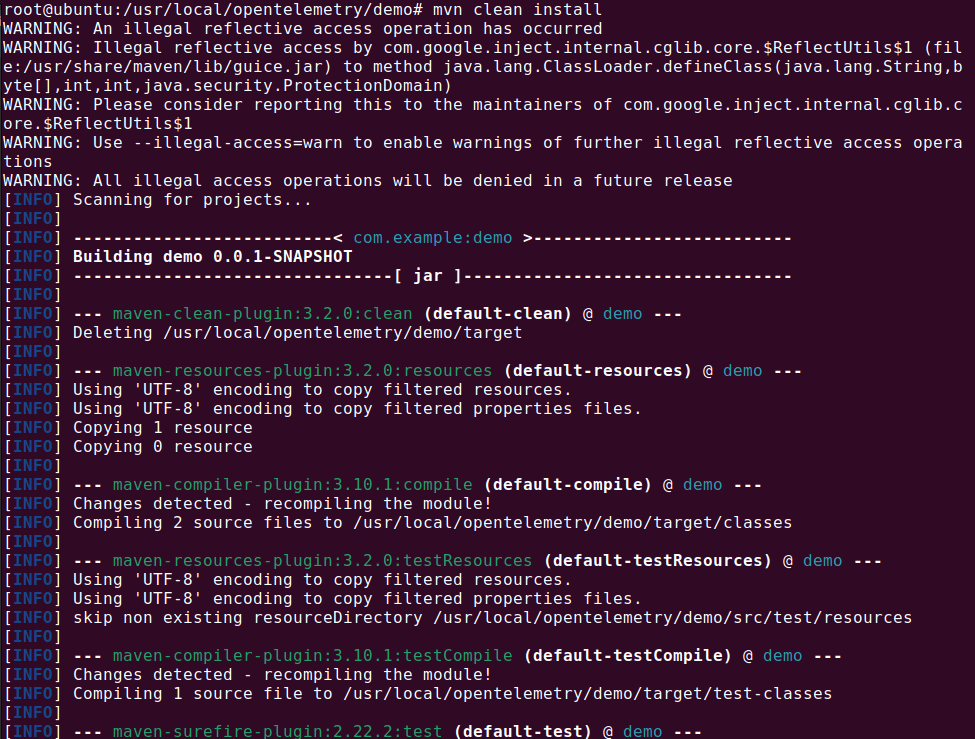
The following screenshot shows how to build the project:

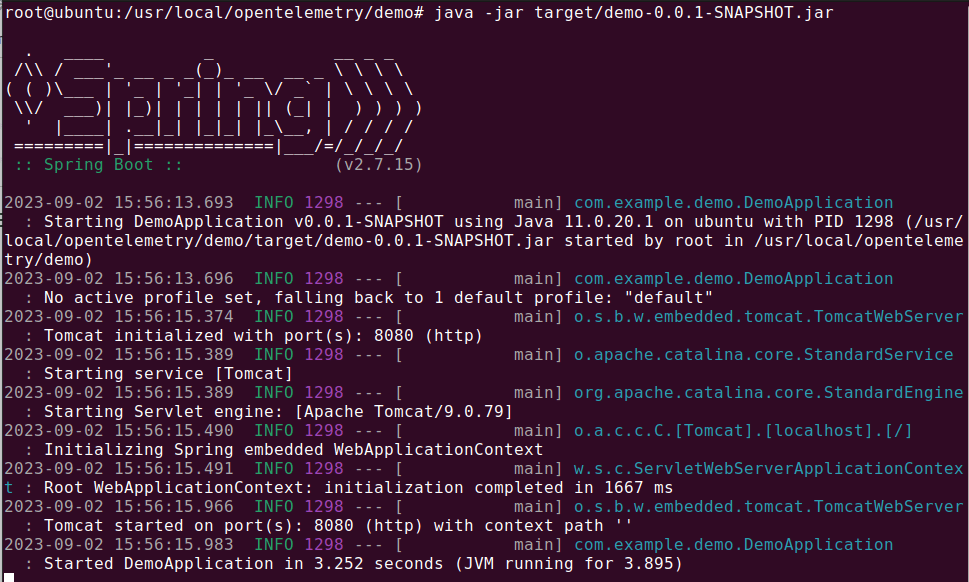
You can start the project using the following command:
java -jar target/demo-0.0.1-SNAPSHOT.jar

With this setup, you can now launch your server. Run the main method in your DemoApplication class, and your server should start up. You can test it by navigating to http://localhost:8080/hello in your web browser. You should see the text “Hello, World!”.
Instrumentation
The final step in our OpenTelemetry in Java example is to instrument our application. Instrumentation involves adding code to your application to generate telemetry data. With OpenTelemetry, you can automatically instrument your application with minimal code changes.
To instrument our Spring Boot application, we’ll use the OpenTelemetry Java agent. This agent automatically instruments your application and collects traces and metrics. To use it, download the latest version of the agent from the OpenTelemetry GitHub repository and add it to your JVM.
Then, update your DemoController class to include a simple trace:
import io.opentelemetry.api.trace.Span;

import io.opentelemetry.api.trace.Tracer;

import org.springframework.web.bind.annotation.GetMapping;

import org.springframework.web.bind.annotation.RestController;

@RestController

public class DemoController {

    private final Tracer tracer = OpenTelemetry.getGlobalTracer("com.example.demo");

    @GetMapping("/hello")

    public String hello() {

        Span span = tracer.spanBuilder("hello").startSpan();

        try {

            return "Hello, World!";

        } finally {

            span.end();

        }

    }

}
With this code, every time you hit the /hello endpoint, the OpenTelemetry Java agent creates a new span named “hello”. You can view these spans in the OpenTelemetry Collector or any other backend that supports OpenTelemetry.
The Lumio OpenTelemetry Java Distro: A No Code Observability Solution
OpenTelemetry is not a full observability platform, as it does not give you a way to store and query and visualize telemetry. Rather, it lets you collect and export data from applications to various commercial and open source backends. OpenTelemetry offers a pluggable architecture that enables you to add technology protocols and formats easily.
Lumigo is the leading cloud native observability platform. Lumigo support for OpenTelemetry comes in two forms:
- Lumigo provides distributions of OpenTelemetry for Python, Node.js, and Java which are optimized to require no code changes to your applications and come entirely pre-configured to report tracing data and resources to Lumigo.
Other implementations of OpenTelemetry, including the OpenTelemetry Collector, AWS Distro for OpenTelemetry, or applications that include any of the language-specific OpenTelemetry SDKs, can export tracing data to Lumigo.

