


Webhooks, those wonderful little lifelines connecting one application to another, have become an essential part of our app notification world. They help keep your systems in the loop, notifying them immediately when events of interest occur. This real-time communication ensures that your applications remain responsive, adaptive, and always up-to-date with the latest information.
At Lumigo, we’re continually innovating to enhance your monitoring and troubleshooting experience. We’re proud to introduce our new webhook integration feature as part of our already robust alert functionality. With this new feature, you can now design custom alerts tailored to your specific needs, integrating your preferred coding language into your desired platforms.
Setting Up Lumigo Webhooks
For this you are going to need a Lumigo account, so if you have not yet signed up for lumigo then this is indeed the time. Go on it will only take a second, Its not only free but you’ll also get to see some great insights from your apps.
- Start by signing into your Lumigo dashboard
- Then go to the left sidebar and choose
Settings>Integrations. - Click on the
integrationbutton under theWebhooksoption and selectadd webhookfrom the dropdown menu.
- Give your webhook a memorable name for easy identification later, and enter the URL where you want the alerts to be sent, and click save.

- Now head to the
Alertsoption on the left menu, just above settings. Edit or add an alert and in section 4 under notifications, you should now see your newly created webhook as an option.
Receiving Lumigo’s Webhook Alerts Locally Using ngrok and Node.js
Where our new custom webhook truly sparkles is in its integration within bespoke coded solutions. It’s designed to be a perfect fit for those who want to weave it into their personalized applications and setups. To truly grasp its potential, let’s delve into an illustrative example. We’ll integrate it using Node.js, and with a sprinkle of ngrok magic, we’ll efficiently tunnel these alerts straight to our local environment.
Here’s a step-by-step guide on how to set up ngrok to tunnel Lumigo’s webhook alerts and process them using a basic Node.js express script:
Setting Up Your Local Environment
First, navigate to a new folder for your demo app in your development environment and run npm init. Next npm install for the two libraries we are going to use express and body-parser.
Then you’ll need a basic Node.js script ready to handle incoming POST requests and output them into the node console log. That will look something like this:
const express = require('express');

const bodyParser = require('body-parser');

const app = express();

const PORT = 3000;


// Use bodyParser to handle JSON payloads

app.use(bodyParser.json());


app.post('/webhook', (req, res) => {

    const payload = req.body;


    // Dump the entire JSON payload to the console

    console.log("Received payload:");

    console.log(JSON.stringify(payload, null, 2)); // This will print the JSON in a formatted manner


    res.status(200).send('Received!');

});


app.listen(PORT, () => {

    console.log(`Server is listening on port ${PORT}`);

});
If you haven’t already, install ngrok into your local dev environment where this demo script will be run. I use Ngrok often for testing demo apps, with it being able to provide a controlled tunnel to apps and scripts for testing.
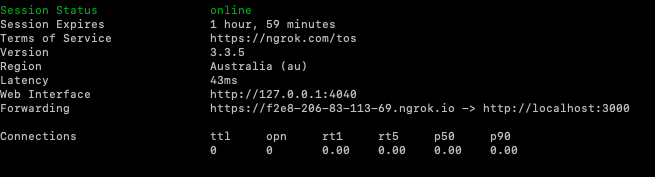
Once installed, you can start a tunnel by pointing it to the port where your Node.js script is running:
ngrok http 3000
Taking our webhook demo for a spin
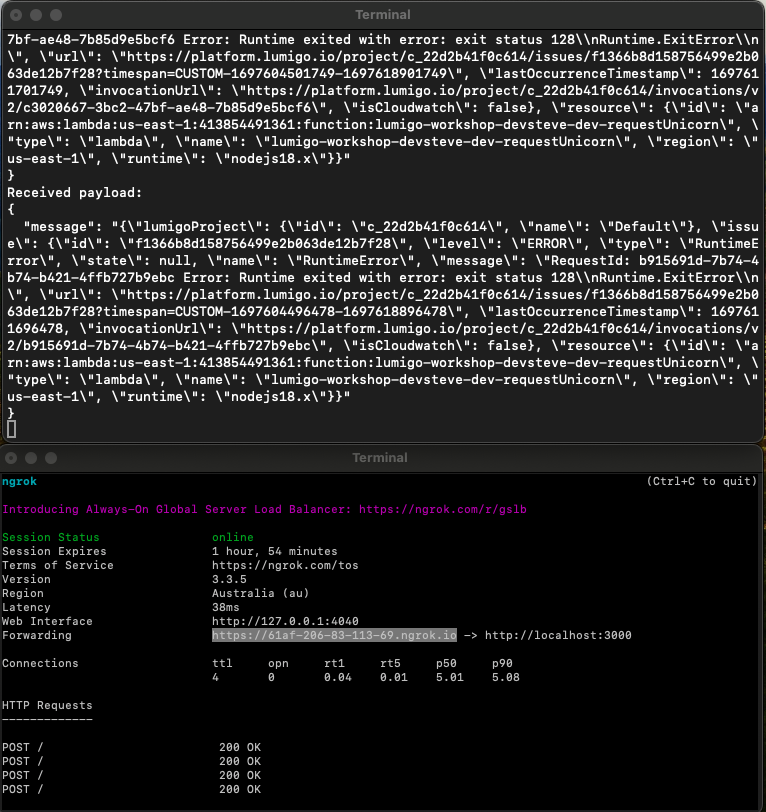
Once Ngrok is able to secure a tunnel out you’ll be provided with a unique URL (both HTTP and HTTPS versions) that routes to your locally running server. This is the URL you’ll use with the Lumigo webhook integration to set up the webhook as per the getting started section above.
To test this new integration you are going to need 2 CLI’s, One to run the node script using node index.js and the other to run the ngrok to connect to it using that command from above. If everything is working as expected you should see something like this
It’s important to note here too that if you restart your ngrok session, that Ngrok URL will change and will need to be updated on Lumigo.
With everything up and running we are ready to start sending some alerts over to our test script. Head to your Lumigo dashboard and use the forwarding URL from the Ngrok output as the url for the webhook to set up an alert.

Lastly trigger a few alerts or wait for an alert to trigger, which should then send alert message json payload to ngrok and the demo webhook script.
What is really astounding and reminiscent of an “Inception” moment is that Lumigo can also be employed to monitor the very script, service, or app you’ve established for handling webhooks. By launching the webhook alert service through a lambda or a container app, Lumigo can oversee not just the webhook application but your regular microservice apps as well.
Once you are finished testing with your demo app remember to clean up any test code and remove any test alerts on your Lumigo dashboard that you’ve got set up.
A Wealth of Webhook Information at Your Fingertips
The expansive data provided through our new webhook functionality enhances its versatility, allowing you to hone in on what’s most significant for your alerts. Here’s some more on the fields that are available:
– Lumigo Project Info: Understand immediately which Lumigo project the alert pertains to with lumigoProject.id and lumigoProject.name.
– Issue Details: With fields like issue.id, issue.level, issue.type, issue.state, and issue.message, you’re given a clear picture of what’s gone awry.
– Issue Timing: issue.lastOccurrenceTimestamp ensures you know exactly when the last issue happened.
– Metrics Details: From the period of evaluation (issue.metric.periodSeconds) to specific stats (issue.metric.statistic) and threshold values (issue.metric.threshold), you’re never left in the dark.
– Resource Information: Know which resource has been affected with detailed fields like resource.id, resource.type, resource.name, resource.region, resource.runtime.
To read more about webhooks and see the full json payload catalog, see the Lumigo webhook documentation.
Receive Alerts Tailored to Your Workflow
Our commitment to adaptability shines through in our webhook integration approach. Instead of confining users to a predetermined set of integrations, this new functionality gives you the ability to connect with any application of your preference. So, whether you’re working with a custom-built application or a particular third-party tool, as long as it’s compatible with a webhook approach, you can integrate it effortlessly.
If you’ve found value in this post and have crafted something innovative using our webhook functionality, we’d love to hear about it! Your creativity and success inspire us to push boundaries further. By sharing your experiences, you not only celebrate your accomplishments but also help others discover the potential of tailored alerts. And, if you believe this information could benefit others, why not spread the word? Sharing this post could be the catalyst for someone else’s next great solution.
We are always eager to witness the unique ways our community leverages the tools we offer. So, reach out and share your story!