


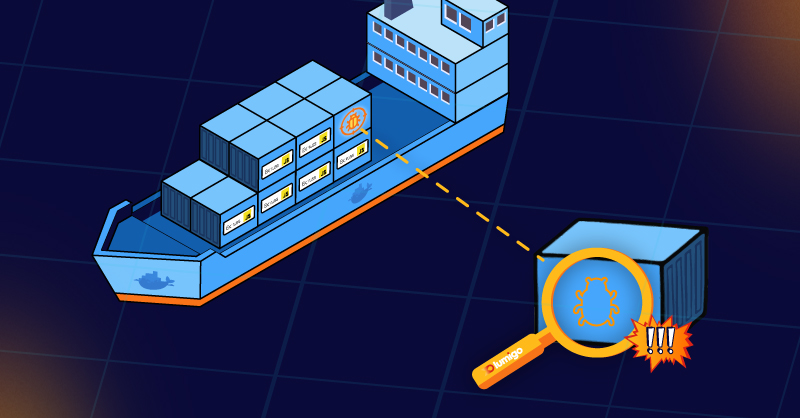
In recent years, the landscape of application development has experienced a paradigm shift, largely driven by the rise of containerization and microservices architectures. Amid this transformation, Express.js has emerged as a dynamic and versatile framework that stands as a one-stop shop for crafting robust web applications. Its popularity owes much to its minimalist approach, allowing developers to swiftly build APIs and web applications with ease. However, what truly sets Express.js apart is its open-source community, a driving force that has propelled it from a simple framework to a comprehensive ecosystem.
In this article, we will learn more about containerized Express.js applications along with some tips and tricks for debugging them.
What Is Express.js on Containers?
Express.js is a web app framework that sits on top of Node.js. It provides a robust set of features to build web applications and APIs. Express.js on containers is a way of running Express.js applications in a containerized environment. This allows for easy scalability and deployment, lightweight footprint and minimal overhead. It also provides a secure and isolated environment for running Express.js applications.
For the purposes of this post, we will learn how to containerize an Express.js app by deploying a simple containerized demo application.
Prerequisites:
- NodeJS installed
- Docker installed
- A lumigo account
- VScode with the Docker Extension
Let’s begin by creating a new working directory using `mkdir`, or equivalent, then navigate into it and run the following:
npx express-generator

npm install
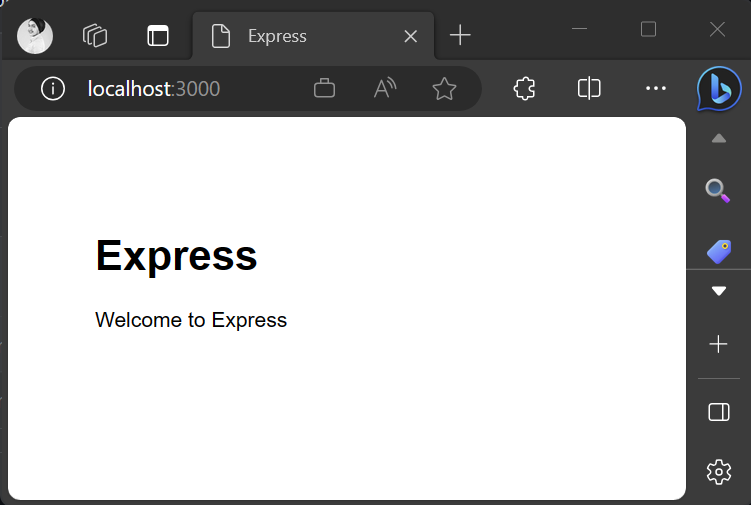
This will create a basic express app using the express generator template. To quickly test the newly created app you can run `npm start`, which should show a “Welcome to express” page from http://127.0.0.1:3000.
With the basic app in place we are then ready to containerize the app. My IDE of choice is VS Code so I will be using the Docker extension for VS Code.
- The first step is to open the project in VS Code.
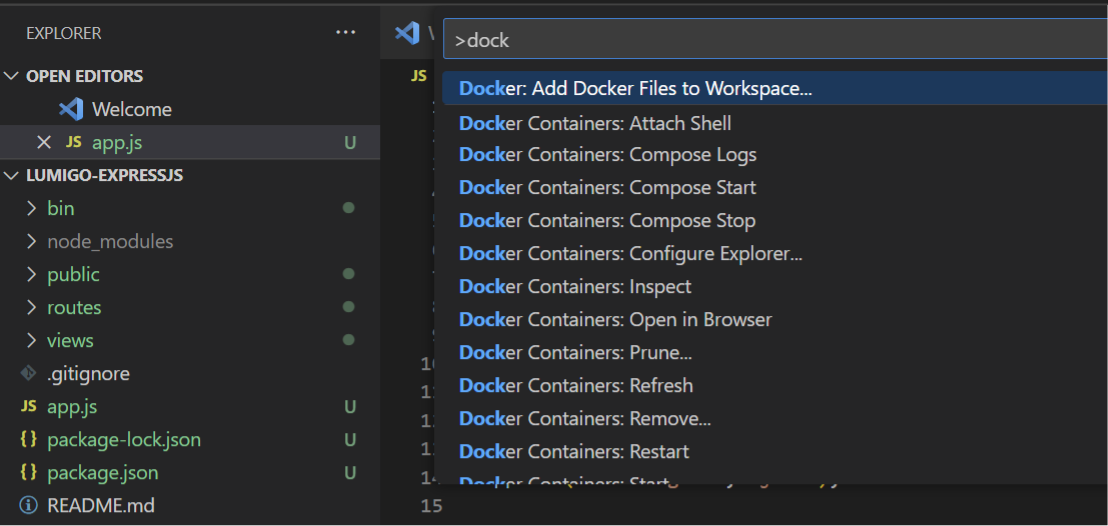
- Open the command palette and use the command Docker: Add Docker Files to Workspace…
- Choose Node.js for the application platform and pick the default package.json file
- When prompted for the application port, enter 3000.
- In the dockerfile file created by the extension, Use ENV instruction to add an environment variable to the service container image.
- Make sure the dockerfile is saved into the root directory of the application.
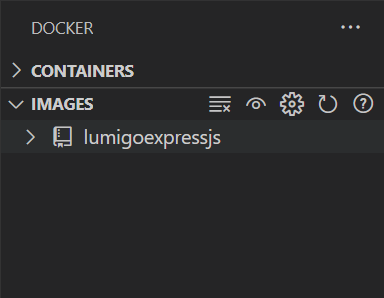
- Next we need to build the service image, for this you will need to use the command within VSCode Docker Images: Build Image…
- Once the image is visible on the images tree, right-click Run and your container should start
To test that everything is running correctly, in a browser head to http://127.0.0.1:8080 which should show the following page:
And there we have it, a containerized Express.JS application!
Simple right? Well, in real life scenarios, things in production code may not go smoothly all the time. It’s common to have bugs and errors surface, which need to be fixed to make sure the application runs as smoothly as possible.
Why Is Express Debugging Important?
Debugging is a crucial aspect of developing Express.js apps, as it helps identify and fix errors in the code. This can help improve the performance and reliability of the app, which not only ensures a smooth app deployment but also a trouble free experience for users of the application.
Debugging can also help identify problems with the application’s architecture, such as inefficient routing or incorrect middleware configuration. Effective debugging tools and techniques allow developers to build robust and error-free applications which have a direct implication on the improvement of the overall user experience. By identifying and resolving issues that may be causing slow response times or unexpected behavior, we are increasing the user’s satisfaction.
Common Errors in Express.js on Containers
To be able to use the relevant techniques and tools for debugging, first you need to be able to anticipate failure scenarios and have an understanding on how errors might occur.
This can be difficult on containers due to the limited visibility into the underlying infrastructure. Some issues might be related to the container’s configuration or resources not to your application’s code.
When developing Express.js applications on containers, you will encounter different types of errors, commonly:
- Middleware Errors: These errors occur when the middleware is incorrectly configured or if its dependencies are not installed and available on the container. It’s important to ensure that the middleware is loaded in the correct order and that there are enough resources for it not to time out.
- Routing Errors: These problems happen when Express cannot find or execute the correct route handler for a given request.
- Container Configuration Errors: These errors occur when the configuration of a container is incorrect or incomplete. This ranges from simple errors like having the wrong image name to more severe errors like weak security settings.
- Networking Errors: These errors occur when the application cannot connect to other services or containers, such as APIs or web servers. Configuration on the network settings might be required to avoid these errors.
Tips and Best Practices for Debugging Express.js Applications in Containers
Now that we have an understanding on what errors to look for with containerized Express.js applications, let’s dive into some of the tools and techniques that will help you resolve any issues you might encounter.
Express Debugging Tools
Before diving into those tools, it is important to remember that debugging containerized applications will require us to adapt the traditional practices to the unique characteristics of the container environment.
Working from a local environment with minimal components, The Node.js Inspector is a powerful tool for debugging Express.js apps. It allows you to step through code, set breakpoints, and inspect variables
To run the node in debug mode, you need to use the inspect command from the root directory:
node inspect app.js

Express.js also provides a built-in debugging middleware that can be used to log information about requests and responses. When an error happens, Express will look for an error-handling middleware in its middleware stack to invoke.
With containerized apps, things start to get a little more complicated as we start to add in additional components like managed distributed services utilized by modern applications and their architectures.
Debugging express applications using Lumigo
Lumigo is one handy tool to help you debug your containerized Express.js applications fast, either locally or as part of a deployment. The best part is, Lumigo can also trace through a multiple of managed services, which helps you see the full picture when debugging applications.
Thanks to its ease of use and fantastic dashboard, you can determine the root cause of an issue in just a few clicks and get visibility down to a variable. Everything is displayed in a visual map that can be searched and filtered thanks to Lumigo’s visual debugging.
Let’s add the Lumigo NodeJs open telemetry distribution to our Express demo, head to the root of the project and run
npm install @lumigo/opentelemetry
With the Lumigo distribution added, we then need to add the following line to our app.js demo application. Open app.js in the express demo application, and add the following to the top of the file:
const lumigo = require(“@lumigo/opentelemetry”);
Finally we just need to add our lumigo token to an environmental variable as part of the container deployment. To find out where to source the Lumigo Token from, check out the docs for more information.
Start the demo app and then head over to the live tail page on your Lumigo Dashboard and refresh http://localhost:3000 a few times to see the traces start to populate.
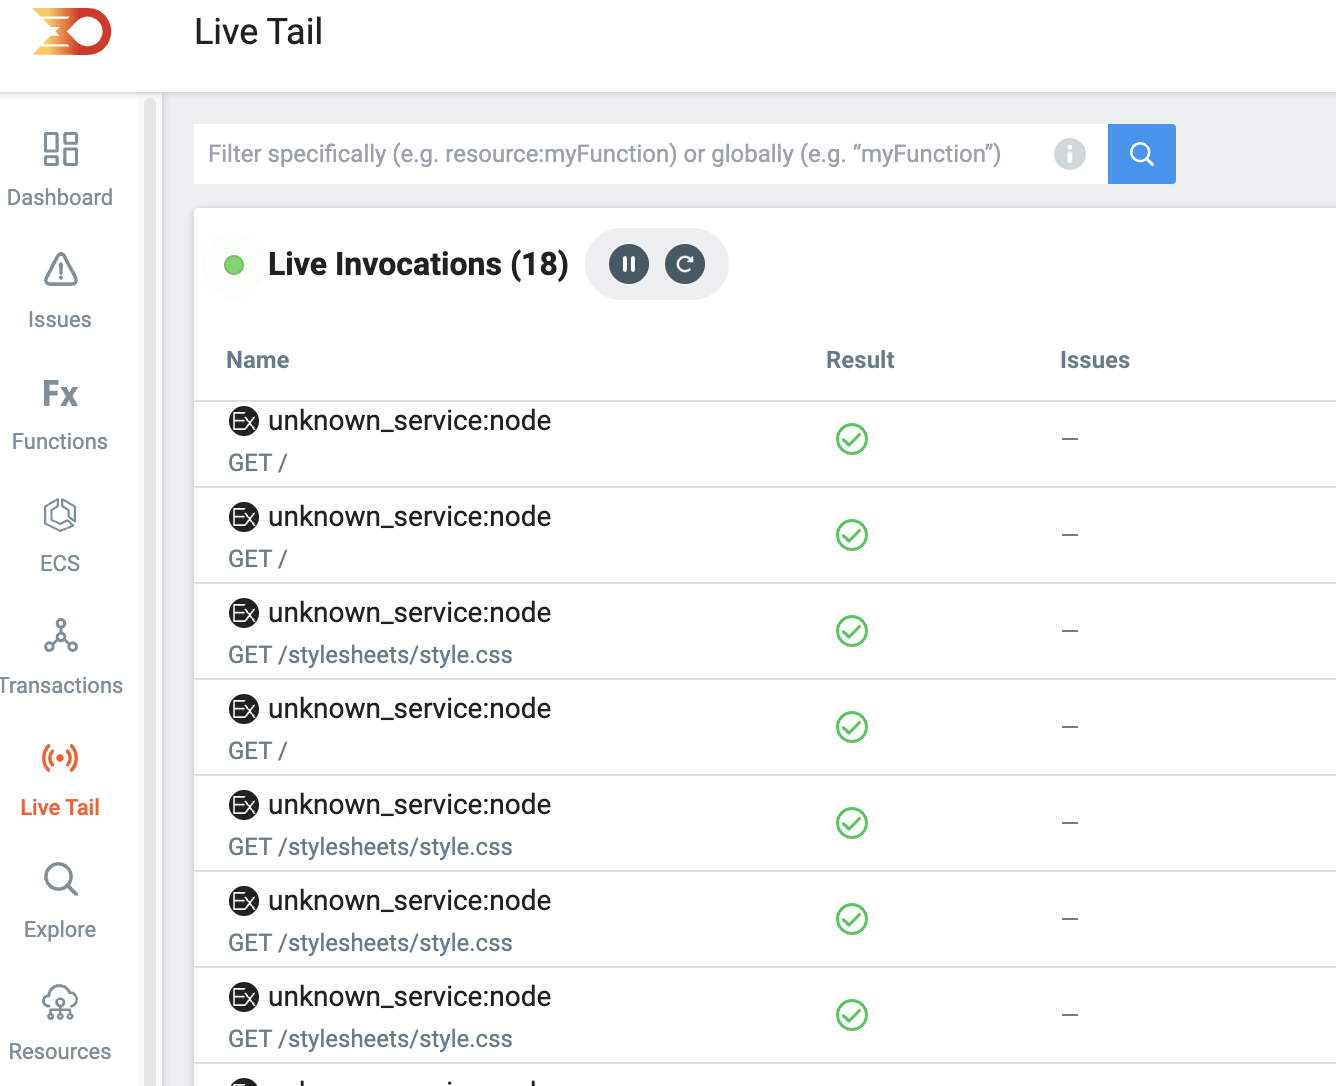
Tip: You can name an application by setting `OTEL_SERVICE_NAME` as an environmental variable. For example `OTEL_SERVICE_NAME=express_demo` would show as:
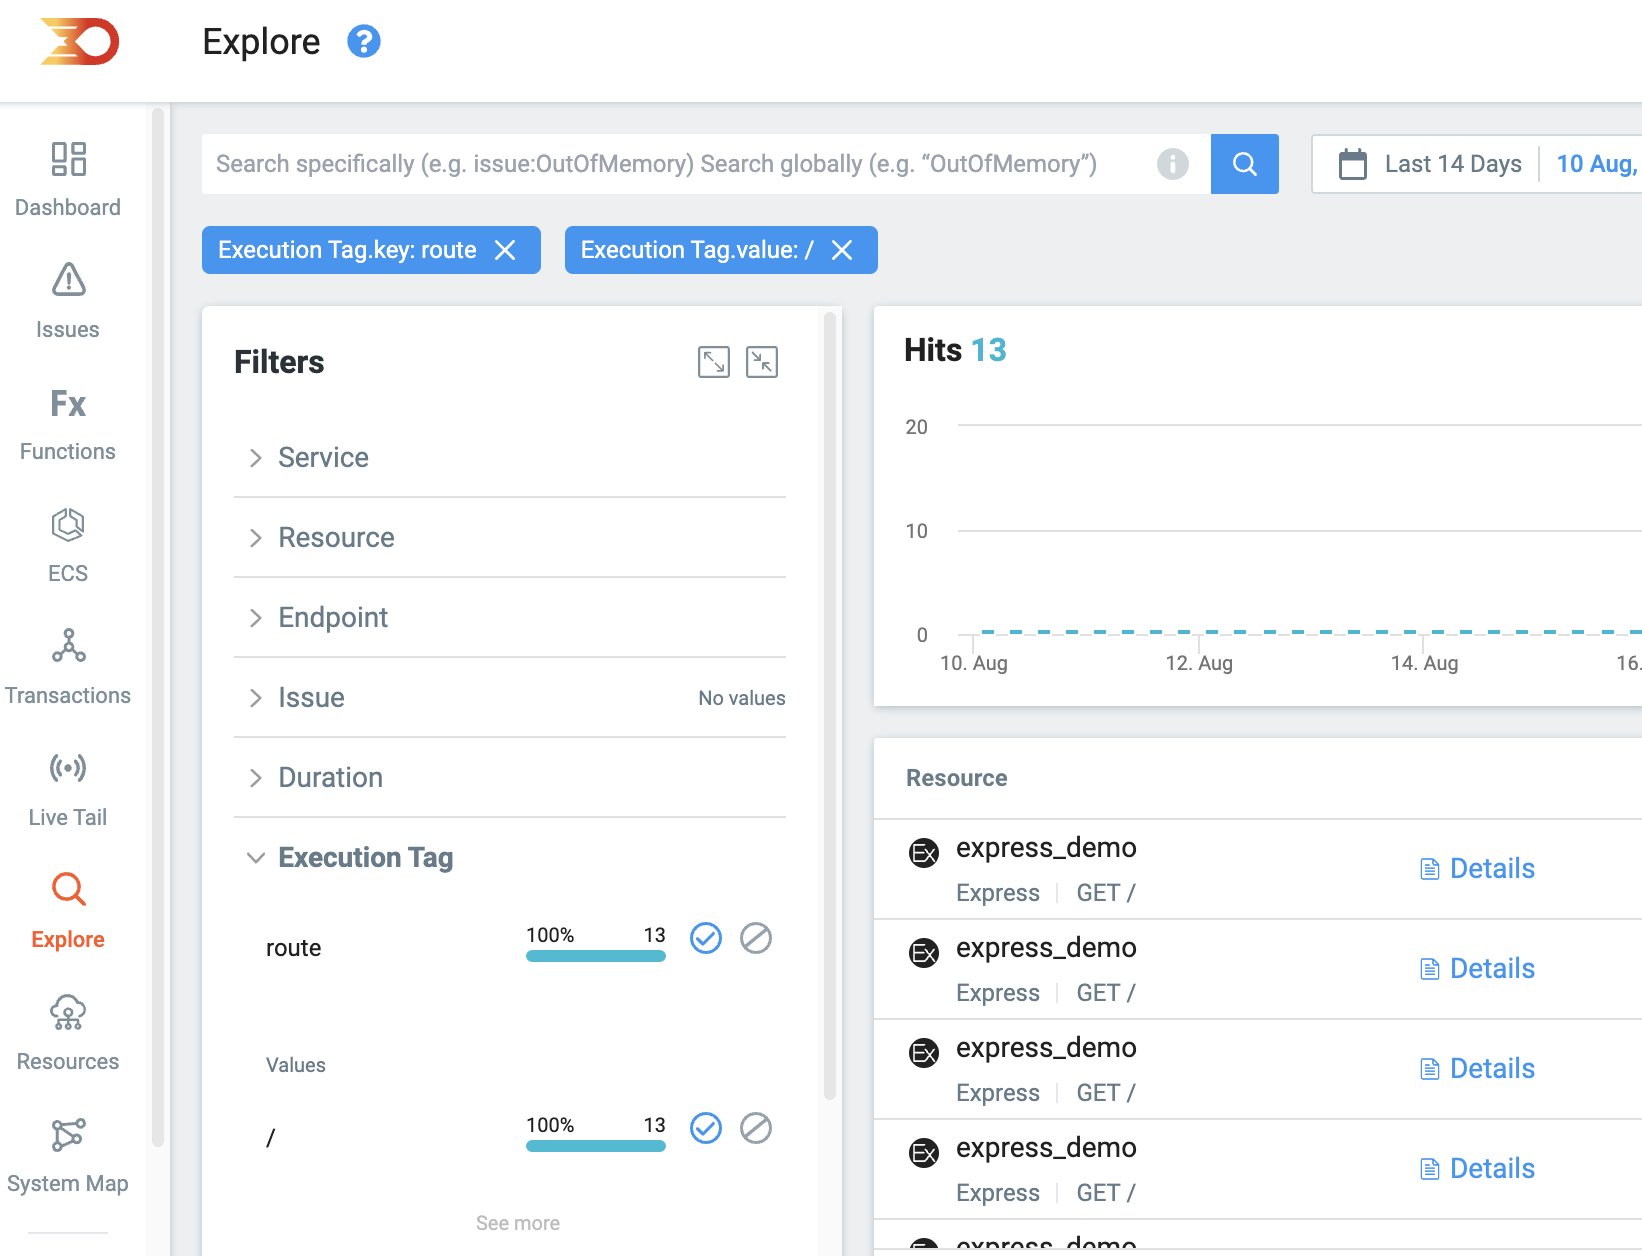
The best part here is that the express routes are automatically turned into Lumigo Execution tags, due to the Lumigo distribution supporting enriched traces from ExpressJS library. Execution tags are extremely useful in helping isolate route specific errors. Read more about Lumigo Execution tags by visiting the docs.
Embrace Immutable and Stateless Design
It is important to remember that containers are not traditional servers. Therefore they shouldn’t be treated as such. When issues arise, avoid trying to update the application or patching the container while it’s running. Containers are designed to be stateless and immutable to ensure the efficiency, reliability and scalability of your containerized application.
Your containerized application should not rely on persistent storage within the container. Use external storage for your files and information. Removing the data from the container itself means that at any time health checks indicate an issue, the container can be cleanly shut down and replaced by a new instance. You should also make sure that the configurations and dependencies of the container are fixed and not changing during the container lifecycle. If your application requires updating then you should build a new image and redeploy it. This way your deployments are much safer.
It is important to familiarize yourself with the practices and tools that will help you debug and deal with any issues arising with your Express.js applications. It’s also important to remember that using containers adds a layer of complexity that will require special tooling to manage and debug a containerized application. As we’ve seen throughout the post, a great tool to help you get insights and debug your containerized Express.js applications is Lumigo. Sign up for Lumigo and make use of its troubleshooting platform to resolve issues timely.